How can ADT's be rewritten for use on other infrastructures?
In this tutorial, we take a closer look at the portability of MiCADOscale. To execute an ADT on a different infrastructure, certain parts have to be rewritten. After completing the tutorial you will be able to identify required changes in the ADT and implement them with the help of the provided documentation.
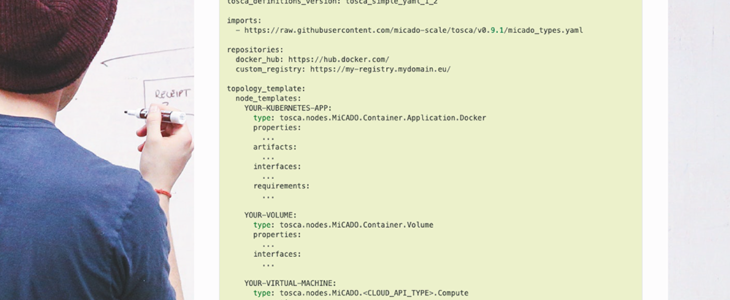
To make the ADT rewriting as transparent as possible, we have chosen the example application "Stress-ng" from the section "demos" of MiCADOscale’s GitHub-repository (Fig. 1).
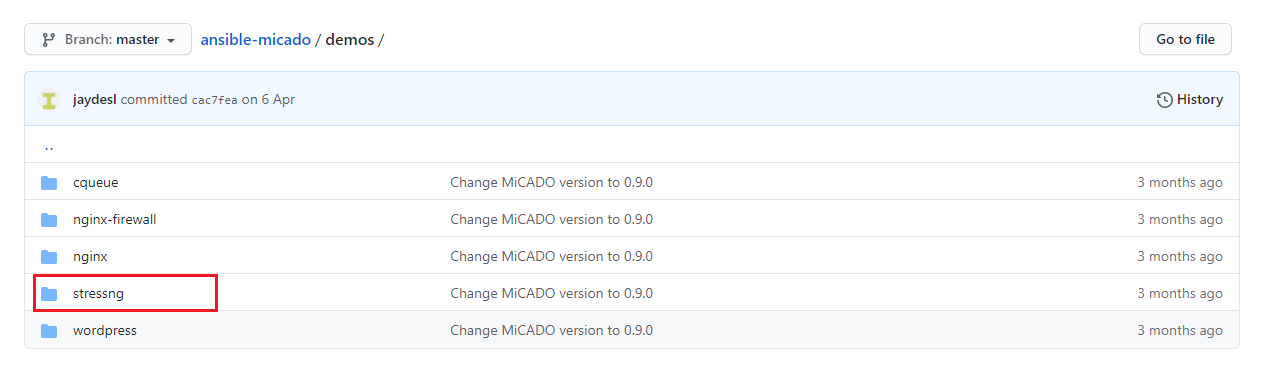
Figure 1: Sub-folder "Stressng"
The starting point is the file "streesng_gce.yaml". This ADT contains the Stress-NG example and can only be executed via the Google Cloud Engine. The goal is to rewrite the file to execute it on AWS-EC2. If you want to check your work, please use the file "stressng_ec2.yaml.
Step 1:
Check the initial situation
Since changes only apply to infrastructure-related dependencies, you should first identify the part(s) of the ADT responsible for describing virtual machines.
Within the section "node_templates" of the file "stressng_gce.yaml" look for the type "tosca.nodes.MiCADO.YOUR_CLOUD_ENDPOINT.Compute".
In the case of “stressng_gce.yaml”, this describes the virtual machines used for Stress-ng and uses the type "tosca.nodes.MiCADO.GCE.Compute" (Fig. 2). All parameters within this section describe the options required by the cloud orchestrators for the deployment of virtual machines with MiCADOscale. In other use-cases, several virtual machines could be specified within one ADT. In this case, you should identify all of these segments first.
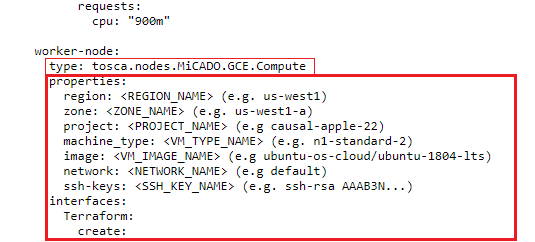
Figure 2: Infrastructure related information in „stressng_gce.yaml“
Step 2:
Is your new infrastructure compatible with the same cloud orchestrator?
The next step is to check whether the infrastructure you are aiming for is compatible with the same cloud orchestrator. To do this, you need information about the cloud orchestrator currently in use. Within the section shown in Figure 2, you will find the subitem "interfaces". Based on the information stored there, you can see that the ADT uses the cloud orchestrator "Terraform". The documentation provides an overview of the compatibility of cloud infrastructures with cloud orchestrators (Fig. 3).
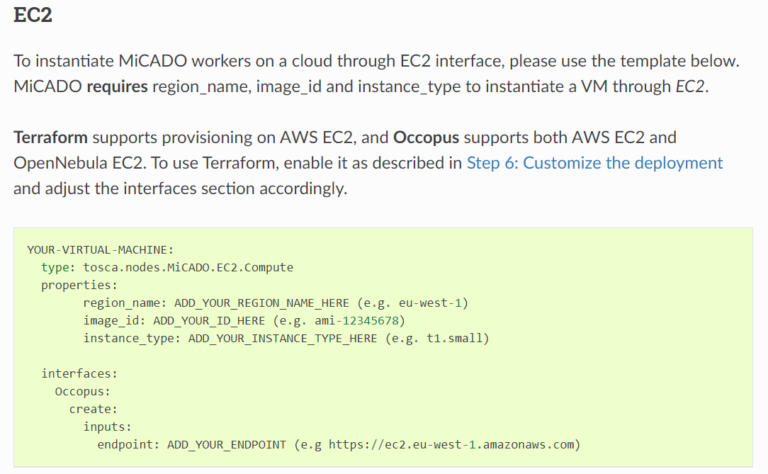
Figure 3: Documentation Snippet regarding the description of EC2 VMs
Step 3:
Altering the Virtual Machine Information
Within the documentation, you can also see which parameters the cloud orchestrator needs to instantiate virtual machines depending on the selected infrastructure.
However, in order to adopt them, you must first remove the old information for the Google Cloud Engine from the ADT (fig. 4).
 worker-node:
      type: tosca.nodes.MiCADO.GCE.Compute
        properties:
        region:  (e.g. us-west1)
        zone:  (e.g. us-west1-a)
        project:  (e.g causal-apple-22)
        machine_type:  (e.g. n1-standard-2)
        image:  (e.g ubuntu-os-cloud/ubuntu-1804-lts)
        network:  (e.g default)
        ssh-keys:  (e.g. ssh-rsa AAAB3N...)
      interfaces:
        Terraform:
          create:
Figure 4: Google Cloud Engine required parameters (crossed out).
Now that the old information has been removed, your ADT should no longer contain any information about the configuration of virtual machines (fig. 5).
 worker-node:

      properties:

      interfaces:
        Terraform:
          create:
Figure 5: Worker-Node properties without cloud-specific parameters.
If all previous steps have been completed, you can start to enter the required parameters into your ADT.
For AWS-EC2 instances, the orchestrator always requires the following information (Fig. 6):
- region_name: Is the region name within an EC2 cloud (e.g. eu-west-1).
- image_id: Is the image id (e.g. ami-12345678) on your EC2 cloud. Select an image containing a base OS installation with cloud-init support!
- instance_type: Is the instance type (e.g. t1.small) of your VM to be instantiated.
Optional parameters can be included in the ADT as required:
- key_name: Specifies the keypair (e.g. my_ssh_keypair) to be deployed on your VM.
- security_group_ids: Specify security settings (you can define multiple security groups or just one, but this property must be formatted as a list, e.g. [sg-93d46bf7]) of your VM.
- subnet_id: Specifies subnet identifier (e.g. subnet-644e1e13) to be attached to the VM.
PLEASE NOTE:
You need to also adjust the "type" parameter according to the documentation (Fig. 6). It is also necessary that you do not compromise the YAML syntax under any circumstances. If you are not sure whether the structure of the YAML file is still valid, it is advisable to use an online validation tool of your choice.
worker-node:
      type: tosca.nodes.MiCADO.EC2.Compute
      properties:
        region_name:
        image_id:
        instance_type:
        key_name:
        subnet_id:
        security_group_ids:
           - <ID‘s OF THE SECURITY GROUP>
      interfaces:
        Terraform:
          create:
Figure 6: Finished ADT for use on AWS EC2.